Table of Contents
Computer Aided Inspection | CIM Notes
Introduction
Computer Aided Inspection
Computer Aided Inspection (CAI) is a new technology that enables one to develop a comparison of a physical part to a 3D CAD model. This process is faster, more complete, and more accurate than using a Coordinate Measuring Machine (CMM) or other more traditional methods. An automatic inspection method and apparatus using structured light and machine vision camera is used to inspect an object in conjunction with the geometric model of the object. Camera images of the object are analyzed by computer to produce the location of points on the object’s surfaces in three dimensions. Point-cloud data is taken from a laser scanner or other 3-D scanning device. During a setup phase before object inspection, the points are analyzed with respect to the geometric model of the object. The software provides a graphical comparison of the manufactured part compared to the CAD model. Many points are eliminated to reduce data-taking and analysis time to a minimum and prevent extraneous reflections from producing errors. When similar objects are subsequently inspected, points from each surface of interest are spatially averaged to give high accuracy measurements of object dimensions. The inspection device uses several multiplexed sensors, each composed of a camera and a structured light source, to measure all sides of the object in a single pass.
Computers are used in many ways in inspection planning and execution also.
Computer controlled inspection equipment
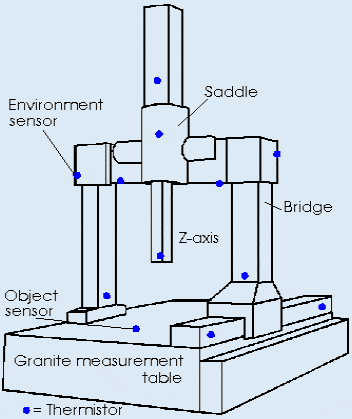
Coordinate Measuring Machine (CMM) is a 3-dimensional measuring device that uses a contact probe to detect the surface of the object. The probe is generally a highly sensitive pressure sensing device that is triggered by any contact with a surface. The linear distances moved along the 3 axes are recorded, thus providing the x, y and z coordinates of the point. CMMs are classified as either vertical or horizontal, according to the orientation of the probe with respect to the measuring table.

Computer aided inspection setup planning
Computer-Aided Inspection Planning (CAIP) is the integration bridge between CAD/CAM and Computer Aided Inspection (CAI). A CAIP system for On-Machine Measurement (OMM) is proposed to inspect the complicated mechanical parts efficiently during machining or after machining. The inspection planning consists of Global Inspection Planning (GIP) and Local Inspection Planning (LIP). In the GIP, the system creates the optimal inspection sequence of features in a given part by analyzing the various feature information. Feature groups are formed for effective planning, and special feature groups are determined for sequencing. The integrated process and inspection plan is generated based on the series of heuristic rules developed. The integrated inspection planning is able to determine optimum manufacturing sequence for inspection and machining processes. Finally, the results are simulated and analyzed to verify the effectiveness of the proposed CAIP.
More Resources /articles
CAD Software | CAD Tutorials
Computer integrated manufacturing Notes , Articles , Interview Que and Ans
Quality Control- Articles , notes , Interview Q and A
Recent Posts
Mechanical Engineering is an essential discipline of engineering encompassing many specializations, with each contributing its unique aspect to the dynamic and inventive nature of this field. With...
The Ram Lalla idol, which is installed at Ayodhya's Ram temple has many significant religious symbols from Hinduism. All 10 incarnations of Lord Vishnu are engraved on the idol. Notably, Lord Ram is...


